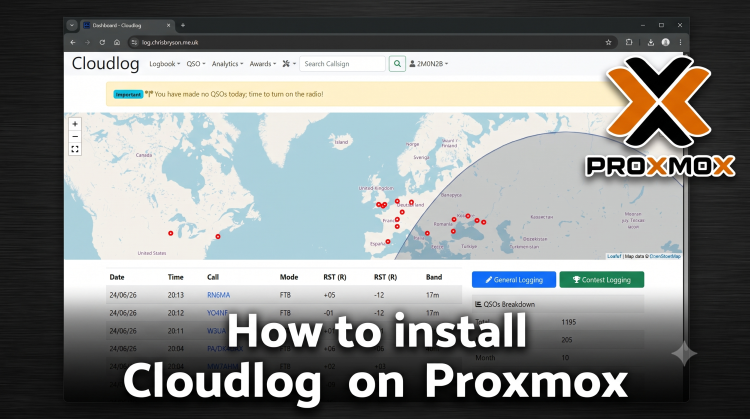
If you’re new to the radio hobby and are looking to pick a place to log your contacts, there are a ton of options available. Since I started in 2022 I’ve been using a combination, like many QRZ has been my “source of truth” then I used applications like N1MM+ for participating in contests, Ham2K PoLo for portable operation, I’ve also dabbled with Log4OM and Station Master Cloud also.
I’ve become increasingly disappointed with QRZ, first of all their API is behind a paywall. I figured I’d pay it and support the site that I and many others use - but after four years QRZ hasn’t got any better, rather it’s got worse. The interface is very dated, not optimized for mobile and downtime has been increasing also.
To cut a long story short I figured I’d change my primary logging tool to something else and came across Cloudlog. Cloudlog is developed by a fellow Scot, is in active development and is appreciated by many users. Cloudlog does have a hosted option at around £4/Month at the time of writing - but you can host it yourself.
I opted to host on my Proxmox server which I use to run many other services including Dynamic DNS and Nginx Reverse Proxy. I didn’t find any guides on how to install it though, so figured I’d create my own. This guide will show you how to install Cloudlog as a Proxmox LXC that can be accessed via your internal network, if you’d like help exposing this externally I can write a guide if it’ll be helpful.
If this helps you out, leave me a comment and let me know! If you’d like to view my logbook - you can by clicking here!
💡 Top tip before you begin - be sure to capture all the passwords as you go! LXC Root Password, Database Password, Cloudlog Admin Password!
Step 1: Create the Proxmox LXC Container
Let’s start by creating a new unprivileged Linux container.
- Log into your Proxmox UI.
- Click Create CT in the top right corner.
- Configure the tabs as follows:
- General: Set a VM ID (e.g.,
105), a hostname (e.g.,cloudlog), and a secure root password. Ensure “Unprivileged container” remains checked. - Template: Choose a standard Linux template (e.g.,
ubuntu-22.04-standardordebian-12-standard). - Disks: Assign 10 GB to 20 GB of space (Cloudlog storage needs can increase depending on uploaded QSL cards, SSTV images and backups).
- CPU: Assign 1 or 2 vCPUs.
- Memory: Assign 1024 MB to 2048 MB RAM and 512 MB of Swap.
- Network: Set your network bridge (
vmbr0) and assign a static IP address or a DHCP reservation.
- General: Set a VM ID (e.g.,
- Finish the wizard, let the container build, and start it up.
Step 2: Install Prerequisites for Cloudlog
Open the Proxmox console for your new Cloudlog container, log in as root, and initiate an update.
apt update && apt upgrade -y
Next, install Apache, MariaDB, Git, and the specific PHP modules Cloudlog requires to run:
apt install apache2 mariadb-server git unzip curl -y
apt install php php-curl php-mysql php-mbstring php-xml php-gd -y
Verify that both Apache and MariaDB are enabled and running on system boot:
systemctl enable --now apache2
systemctl enable --now mariadb
Step 3: Configure the Database
Secure your database engine and deploy the standalone user and schema for Cloudlog.
-
Run the built-in database security wizard:
mysql_secure_installationFollow the prompts to configure a database root password, remove anonymous users, disable remote root logins, and clear out the test database.
-
Log into the MariaDB shell:
mysql -u root -p -
Create the database database, database user, and map permissions layout:
CREATE DATABASE cloudlog;
CREATE USER 'cloudloguser'@'localhost' IDENTIFIED BY 'YourDatabasePassword';
GRANT ALL PRIVILEGES ON cloudlog.* TO 'cloudloguser'@'localhost';
FLUSH PRIVILEGES;
EXIT;
Note: When executing privilege controls or system updates, seeing
Query OK, 0 rows affectedis completely normal and means the configurations were applied successfully!
Step 4: Download Cloudlog and Set Directory Permissions
With the database ready, we can clear Apache’s default placeholder page and use Git to pull the latest production branch of Cloudlog directly into the web root:
rm /var/www/html/index.html
git clone https://github.com/magicbug/Cloudlog.git /var/www/html
Cloudlog requires web server write access to specific subdirectories for configurations, upgrades, lookup structures, and QSL assets. In Debian/Ubuntu stacks, Apache runs under the www-data group profile.
Run the following block to explicitly align directory ownership and set appropriate write flags:
chown -R root:www-data /var/www/html/application/config/
chown -R root:www-data /var/www/html/application/logs/
chown -R root:www-data /var/www/html/assets/qslcard/
chown -R root:www-data /var/www/html/backup/
chown -R root:www-data /var/www/html/updates/
chown -R root:www-data /var/www/html/uploads/
chown -R root:www-data /var/www/html/images/eqsl_card_images/
chown -R root:www-data /var/www/html/assets/json/
chown -R root:www-data /var/www/html/assets/sstvimages/

chmod -R 775 /var/www/html/application/config/
chmod -R 775 /var/www/html/application/logs/
chmod -R 775 /var/www/html/assets/qslcard/
chmod -R 775 /var/www/html/backup/
chmod -R 775 /var/www/html/updates/
chmod -R 775 /var/www/html/uploads/
chmod -R 775 /var/www/html/images/eqsl_card_images/
chmod -R 775 /var/www/html/assets/json/
chmod -R 775 /var/www/html/assets/sstvimages/
Step 5: Complete the Web Installation Wizard
- Open your web browser and navigate to the container’s local network IP address (e.g.,
http://192.168.1.123). - The Cloudlog setup wizard will look for database parameter configurations. Supply the details configured in Step 3:
- Host:
localhost - Database Name:
cloudlog - Username:
cloudloguser - Password:
YourDatabasePassword
- Host:
- Directory Field: Leave this entirely blank because Cloudlog was pulled right into the top-level web root folder (
/var/www/html). - Follow the remaining user configurations prompts to finalize your administrator logging identity, it may take a few minutes to complete the install.
Step 6: Post Install Actions
- Default Credentials Bypass: Log in using the default fallback username
m0abcand passworddemoif prompted, then navigate straight to the Admin Dropdown, build out your personal custom profile, assign it administrative flags, and delete the stockdemologin. I personally created an admin account, and then a normal operator account for my daily use.
Suppressing CodeIgniter PHP Deprecation Notices
You may notice dynamic property deprecation warnings spanning the screen. Switch Cloudlog into production mode to cleanly hide them:
- From the container shell, open the core framework script:
nano /var/www/html/index.php - Locate the environment definition line near the top and shift it from development to production:
define('ENVIRONMENT', 'production'); - Save (
Ctrl+O,Enter) and exit (Ctrl+X).
Feel free to use VIM if you like, I prefer nano. 😉
Step 6: Configure Automated Tasks
Cloudlog manages heavy recurring tasks (like syncing global DXCC lookups or importing LotW records) asynchronously via system cron tasks.
- Again from the container shell, open the automated scheduling engine:
crontab -e - Scroll to the absolute bottom of the file and insert the following maintenance timers:
# [Cloudlog Automation Rules] # Sync general DXCC prefixes daily at midnight 0 0 * * * /usr/bin/php /var/www/html/index.php update dxcc > /dev/null 2>&1 # Sync LoTW user profile indicators weekly on Sunday at 11 PM 0 23 * * 7 /usr/bin/php /var/www/html/index.php update lotw_users > /dev/null 2>&1 # Sync personal records against Logbook of The World hourly 0 * * * * /usr/bin/php /var/www/html/index.php lotw import > /dev/null 2>&1 - Save and close the scheduler. The system will automatically register and lock in the background timers.
At this point you should be done - fairly painless I hope? Let me know how you got on if this was helpful!
73 de 2M0NZB