In this post I’ll step through how to swap out the dated Ford Sync 2 for the much improved Sync 3 infotainment system on my MK3.5 Ford Focus in the UK!
At the end of last year I picked up my 2015 Ford Focus ST-3. The infotainment system on it looked great on paper! It came with a 8″ Touch Screen Display, Satellite Navigation, Bluetooth Calls/Audio, Reverse Camera and a USB Audio Interface. As great as it sounds, using it wasn’t a great experience. The touch screen technology is similar to that of PDA’s in the 90s, the interface lags compared to modern systems and the navigation data was out of date.
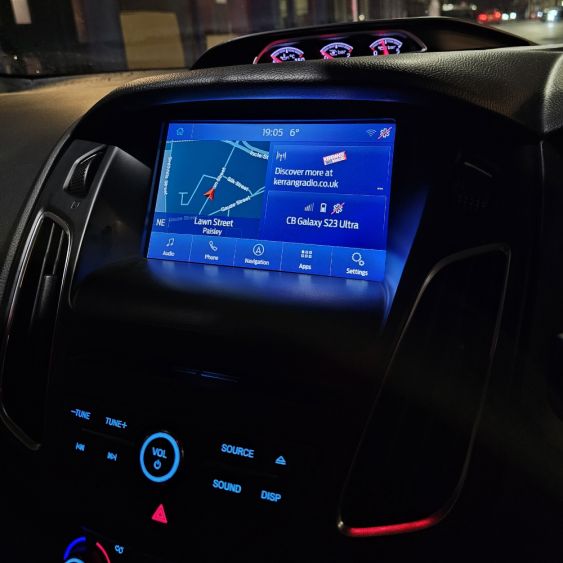
Lucky for me it’s a very easy process to swap out the Sync 2 system for the Sync 3 system! Sync 3 benefits from a more modern user interface, it’s much faster, has a modern touch screen display and provides support for Apple CarPlay and Android Auto.
What do you need? 🧰
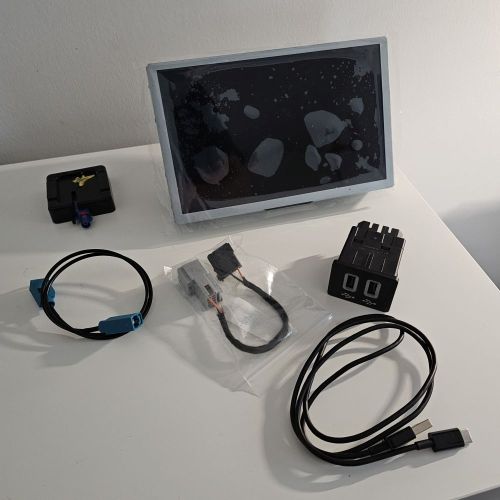
Below is a list of the parts you’ll need to fit to the car, I’ve shared the part numbers that I’ve got and that worked for me, but there are others that are compatible.
- Ford Focus Sync 3 APIM Module (JM5T-14G370)
- GPS Antenna (C1BT-19C175-AB)
- USB Hub (2502231)
- USB Media Hub Wiring Adapter
- Fakra Z Antenna Cable – Female to Female
- Double Sided Sticky Tape/Pads
- Rubbing Alcohol or Adhesive/Silicone Remover
You’ll also need the following tools.
- Trim Removal Tools
- Torx T25 Screwdriver
- Torx T8 Screwdriver
- Flathead Screwdriver
Removing the Sync 2 Unit 🪛
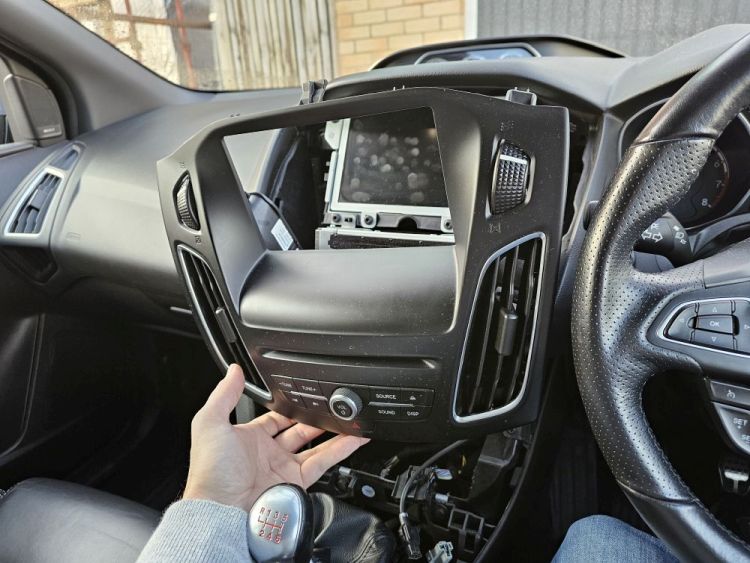
Start with the trim removal tool and remove the trim that runs to the right hand side of the heater controls. Pop this out and work your way round until it comes loose completely. Do the same for the trim above the heater controls, it’s also held in with clips and comes out easily with a trim removal tool. Remove the four Torx T25 screws under the radio, and the single T25 screw at the base of the gear lever. The five screws you remove are all the same size, put them somewhere safe – I put those into the cup holder.
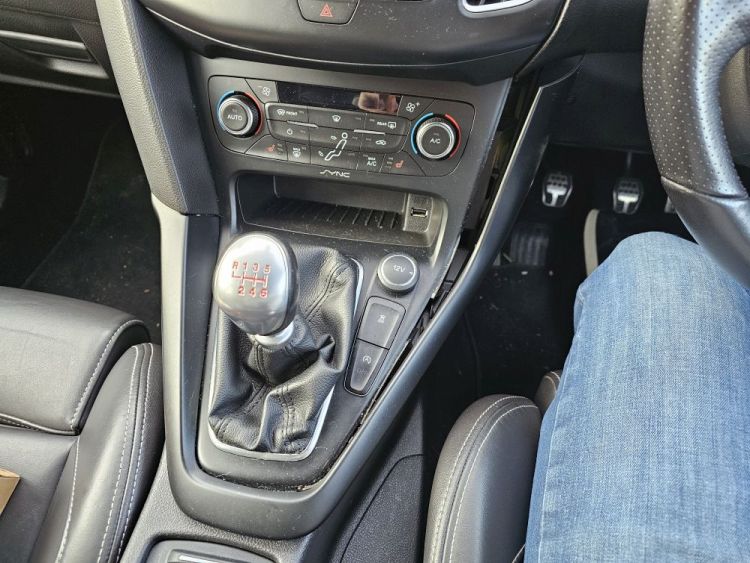
With the screws removed, pop the gear lever surround and heater controls out of the center console. The leather gaiter around the gear knob can be popped out allowing you to lift the plastic surround above it. Disconnect the heater controls, 12v power socket and the USB socket. Note that the USB socket for me was a little tough to remove – I used a flat head screwdriver and force to remove it. When removed, you can move the panel away giving you more space to work.
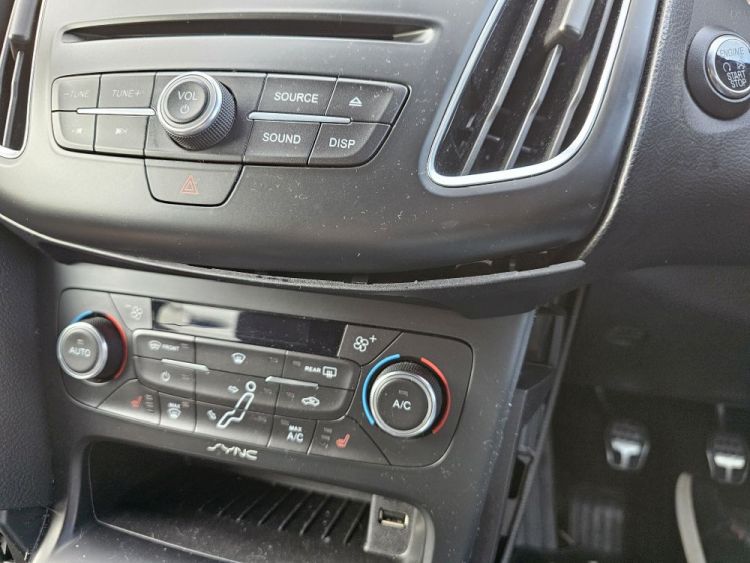
With the heater controls out the way, the radio controls are simply held on with friction. From underneath (Where you can see my hand) pull the radio controls towards you and they’ll pop out from the dashboard, disconnect the single connection on the rear and move it away from the dashboard.
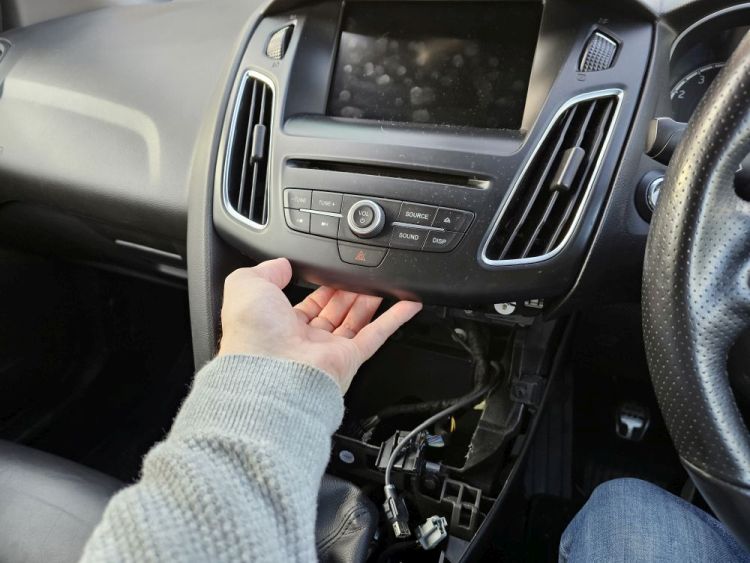
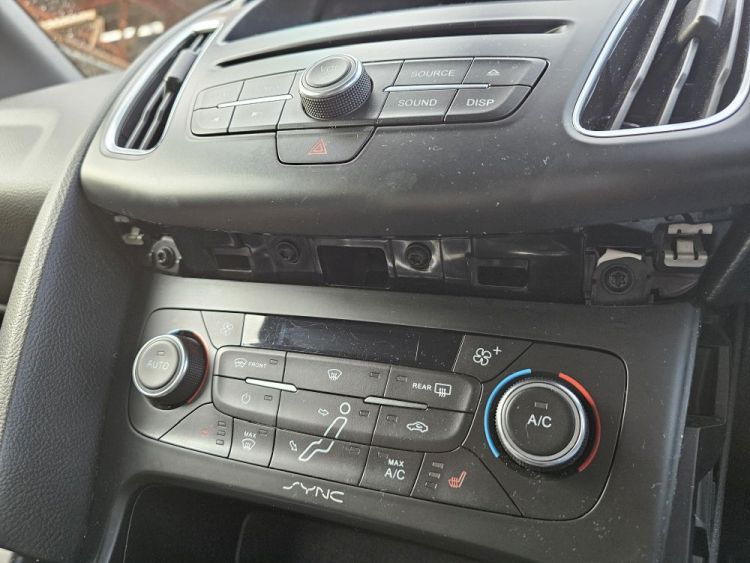
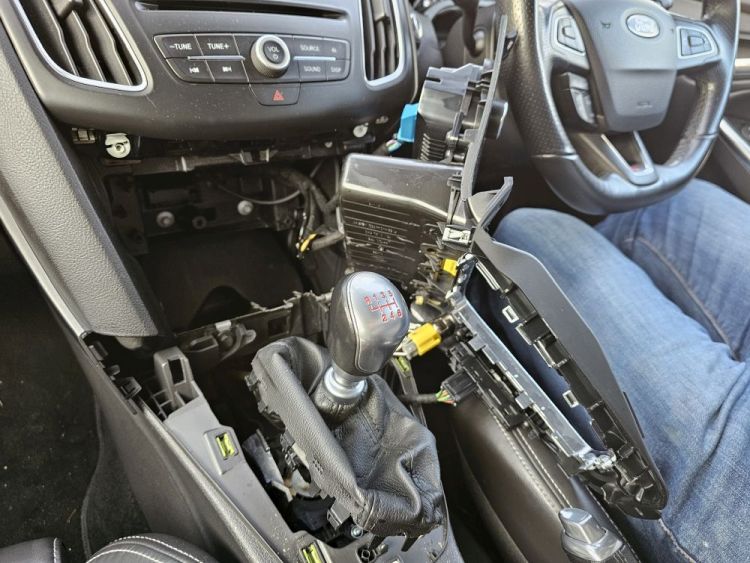
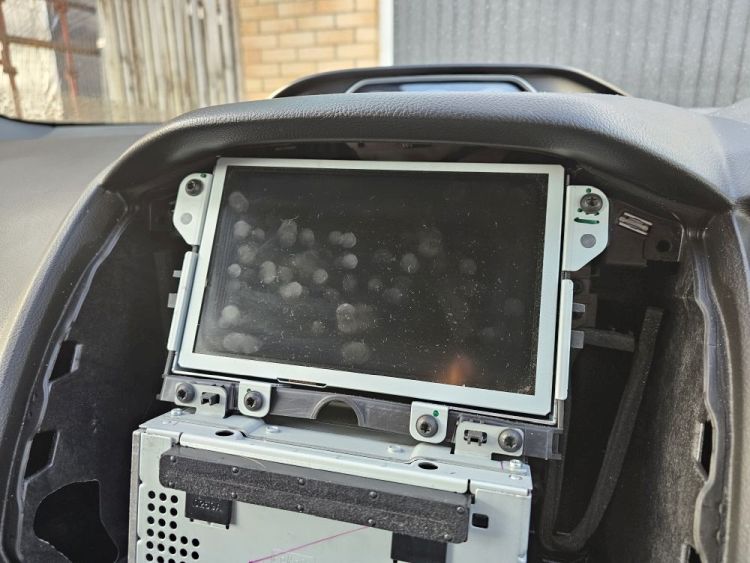
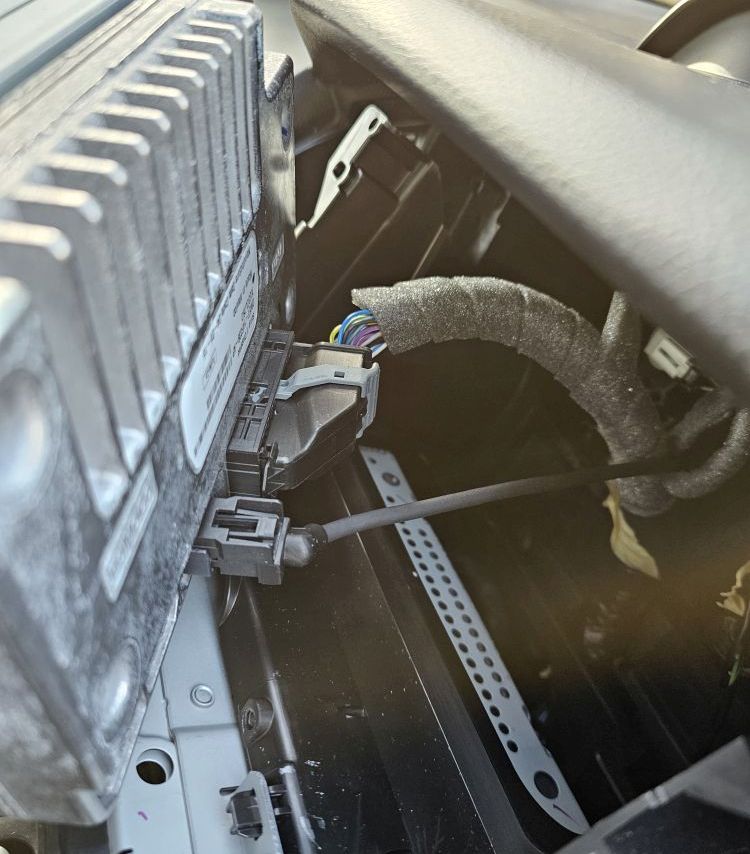
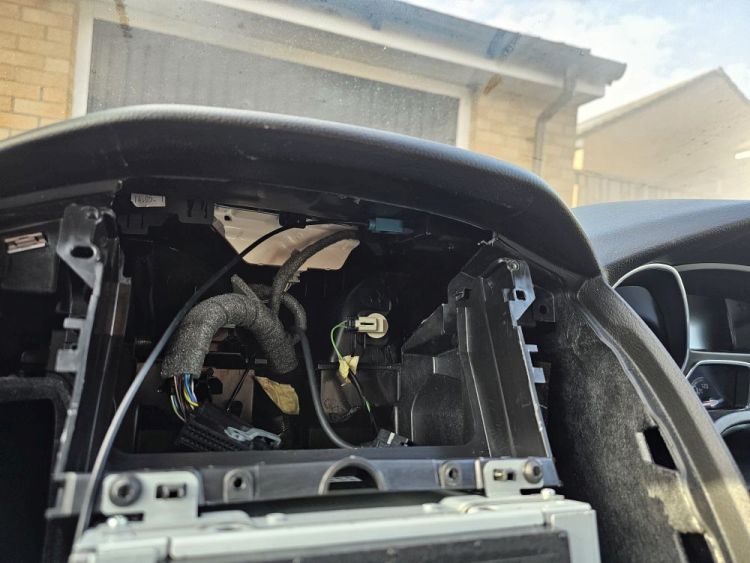
Around the screen you’ll see there are four Torx T25 screws holding it in place. Each of these are same size, but are shorter than the ones removed earlier. Remove these and keep them aside, wiggle the Sync 2 APIM Module out of the dashboard. The top of the dashboard is flexible and can be pushed up to aid removal. When removed, disconnect the two connections on the rear.
Fitting the Sync 3 Unit
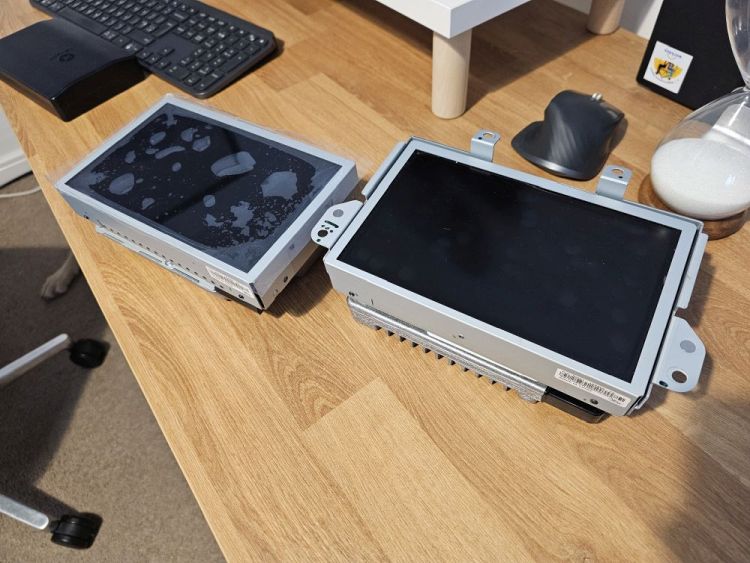
Place the Sync 2 and Sync 3 modules side by side. Remove the mounting bracket from the Sync 2 module and move it over to the Sync 3 one. These screws require a T8 screwdriver.
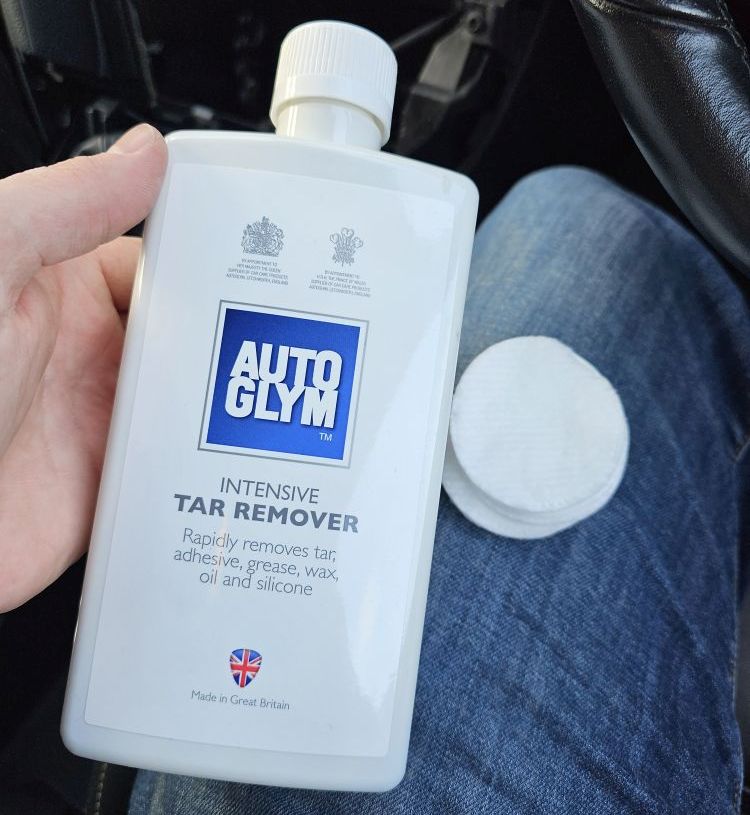
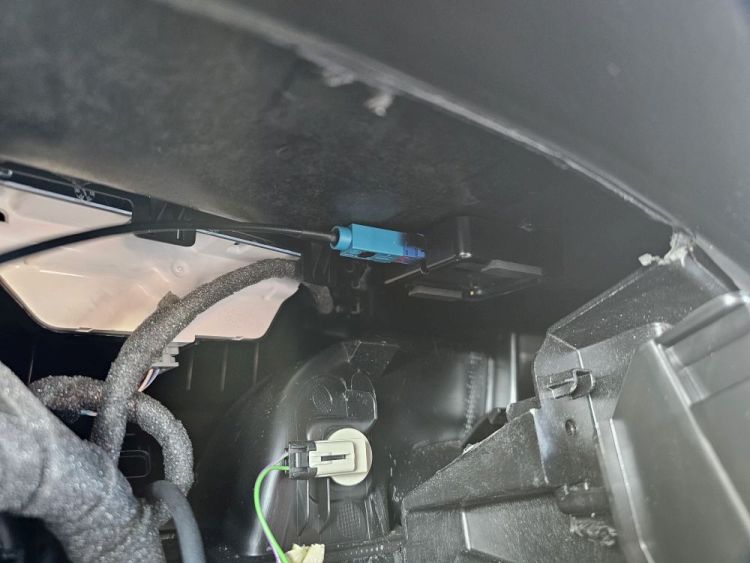
Using some isopropyl (rubbing) alcohol or a solvent such as tar remover, clean the surface of the GPS antenna and a clear section under the dashboard and attach the GPS antenna as shown. Failure to clean both surfaces will result in poor adhesion and you risk the GPS falling off and rattling within the dashboard. As you can see, I used Auto Glym Intensive Tar Remover with my daughters make up pads and secured with Gorilla Glue Double Sided Tape.
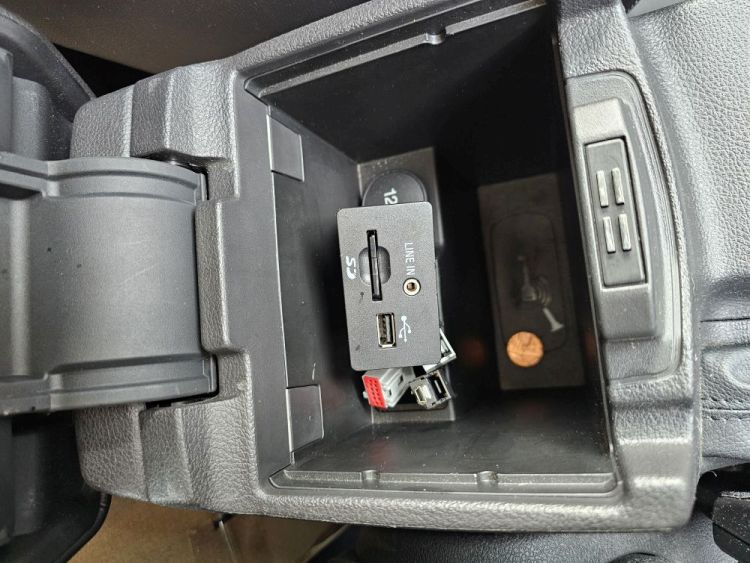
Inside the armrest now, use a flathead screwdriver to pry out the original media hub. Disconnect the wires from the original and connect the wiring adapter. Connect the cables to the new USB hub. Note, my USB hub has two ports and does not provide the slave connection to the front USB port so the front USB port will no longer work. My hub is also slightly smaller than the original so I’ll need to source a frame to sit it in. I’m fine with both of these points, but both could have been avoided with a different USB hub. Unfortunately they were all £100+ at the time of posting, the one I’m using was £70 direct from Ford.
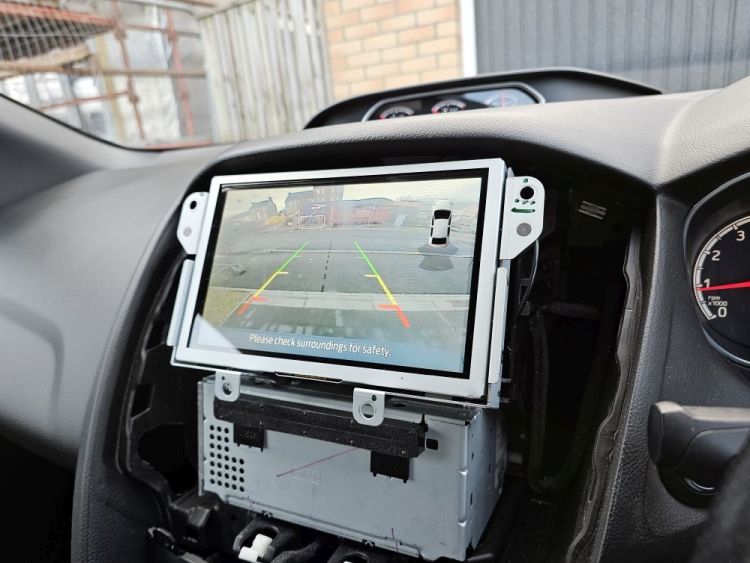
From this point on, fitting is the reverse of the removal you’ve done so far with the only difference being you’ll be connecting the GPS to the Sync 3 APIM module. Before plugging everything back in, I ensured that everything was working. I confirmed Radio/DAB, Bluetooth, Reverse Camera, GPS and Android Auto worked!
Then I noticed something that ruined my morning…
When fitting the Sync 3 APIM Module, I managed to crack the screen! 😠 I’ve fitted countless car radios, reverse cameras and bluetooth kits over the last 20 years and I’ve never made a mistake like this before. To say I was angry with myself is an understatement!
Job done!
I contacted the eBay Seller that I bought the APIM Module from, kevwynne37 who offered to replace the screen for a very reasonable price. After receiving the repaired unit back, I took a little more care when fitting and I’m overall very happy with the end result!